
Cleaning and Sealing Terracotta Tiled Flooring in Bannockburn
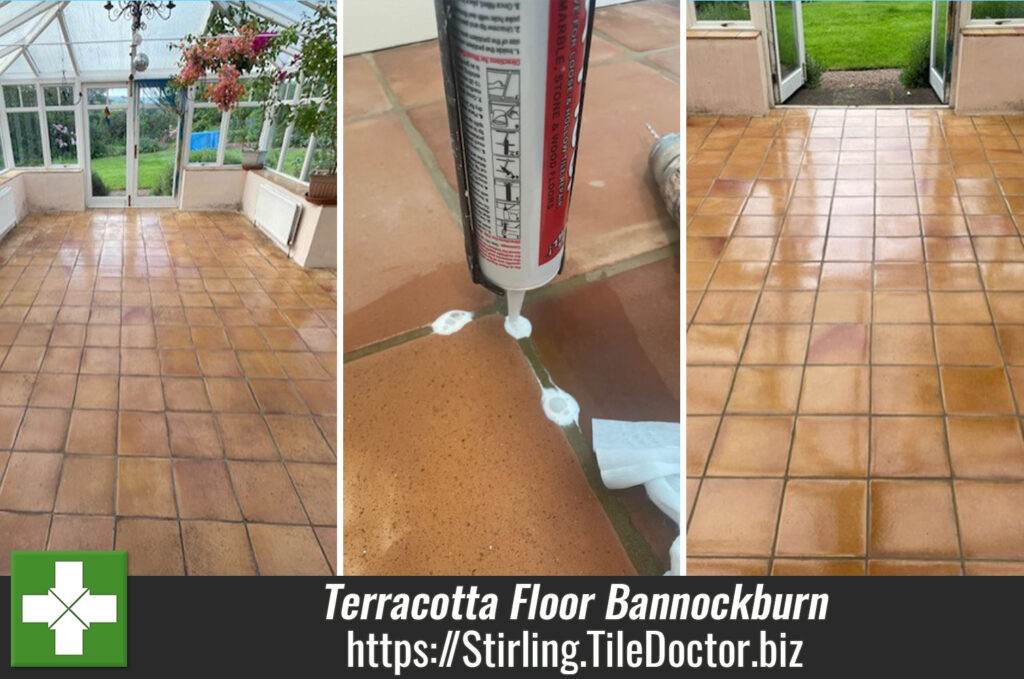
This cottage in Bannockburn had 70m2 of Terracotta tiled flooring in various rooms across the property including the conservatory, kitchen, utility room and porch. The tiles had not been sealed since they were laid 30 years previously and now needed renovation, including removing what was left of the old sealer, deep cleaning then and resealing.

Without an active sealer protecting the porous Terracotta had no protection from ingrained dirt and were heavily soiled in the busier areas, also some of the tiles were loose and wobbly.
I worked out a quote for the renovation and due to the size of the area I planned on splitting the work into three sections. This would make the job more manageable and has the advantage of minimising the impact on the homeowner’s movement around their home. Happy with my plan the quote was accepted and we worked out a schedule for the job to start.
Cleaning a Terracotta Tiled Ground Floor
Before starting work in a section all the moveable furniture was removed and the rest was protected from the cleaning and resealing process. To tackle what was left of the old sealer and deep clean the Tile and Grout a strong dilution of 2 parts water to 1 part Tile Doctor Pro-Clean was applied to the floor.
The strong dilution makes an extremely effective as a stripper and cleaner and was applied with a cloth and then left for ten minutes. This gives the product time to breakdown the dirt and old sealer. The floor was then scrubbed using a black pad and then once complete the soiled solution was removed with a wet vacuum. The floor was then rinsed with clean water and extracted again.
The next stage of the process was to neutralise the floor as it would be alkaline after the clean. To do this I used an acid to rinse the floor called Tile Doctor Grout Clean-Up. This product not only neutralises the floor preventing the build-up of efflorescence which can be a problem for old floors. It also provides a better bond between the floor and sealer. During this process a grout brush was used to ensure all the grout had been reached during the cleaning process. The Tile Doctor Grout Clean Up solution was then extracted with the wet vacuum and then the floor is thoroughly rinsed.
While the floor area that had just been stripped and cleaned was left to dry before sealing, I repaired the “wobbly” tiles which will prevent them from cracking and becoming a hazard. Small holes were drilled into the grout around the moving tile and then injected with a filler. The tiles were then left for 24 hours for the filler to cure and then the tiles were tested to ensure the issue has been fixed.

Sealing a Terracotta Tiled Ground Floor
When the tiles had been thoroughly cleaned, rinsed and given time to dry, they were tested with a damp meter to ensure they were dry and ready for sealing. The readings were fine and I had selected two different sealers to protect the floor. Two were needed to match the clients finish requirements which were to enhance the colour of the tiles and for them to have a slight sheen finish.
First the tiles were given a coat of Tile Doctors Colour Grow sealer which as the name states enhances the natural colours in terracotta tile. The coat was given 30 minutes to dry before the second sealer was applied.
The second sealer was Tile Doctors Seal and Go which is a topical sealer and works well with Tile Doctor Colour Grow. Tile Doctor Seal and Go leaves a slight satin sheen on the tiles and six coats were needed to complete the process. This did take some time as each coat needed time to dry before the next coat was put on.

For aftercare cleaning I recommend the use of Tile Doctor Neutral Tile Cleaner which is a mild but effective Tile and Grout cleaner that won’t upset the sealer which can be the issue with the stronger products you find in supermarkets.
Professional Restoration of a Terracotta Tiled Ground Floor in Stirling
Cleaning and Sealing Terracotta Tiled Flooring in Bannockburn Read More »


